| |||||


Intake manifoldWarning: Before doing this mod, please read the points below. It might not be as straight forward for every car! It looks like there are two types of alternators that are used on this engine! The 100A's (like in my car) have no fitting issue's. But it looks like the 120A's that are on some engine's will not clear the manifold, not even after modifying the cover, like described below! Make sure you have done one of the EGR mods before attempting to fit this manifold. This manifold does NOT have a connection for the EGR pipe. There are two possibilities:
And now for the mod itself :).
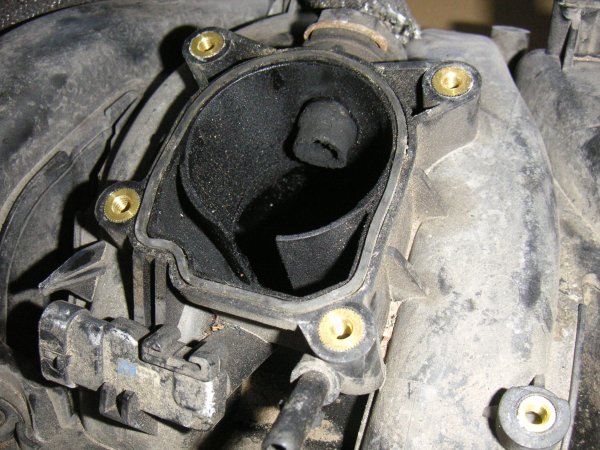
After I saw the first results on the individual throttlebody kit from TMS it began to get clear for me that the intake manifold might be a limiting factor for a standard Z22SE engine. On the Z22SE forum were some posting from Vocky on modifying the standard intake manifold. So I decided to buy a second hand intake manifold and throttlebody on Ebay. After cutting the manifold open with a hacksaw it became clear that the standard manifold is certainly not optimal. First thing is the hose for the EGR (exhaust gas recirculation) which is directly in the airflow from the throttlebody (not to mention the residue it leaves in the manifold and on the throttlebody).
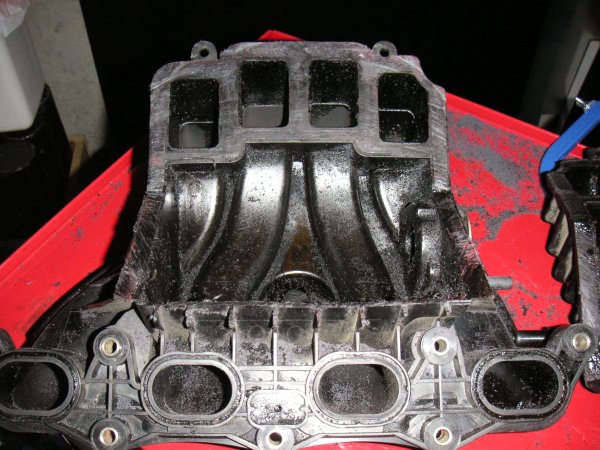
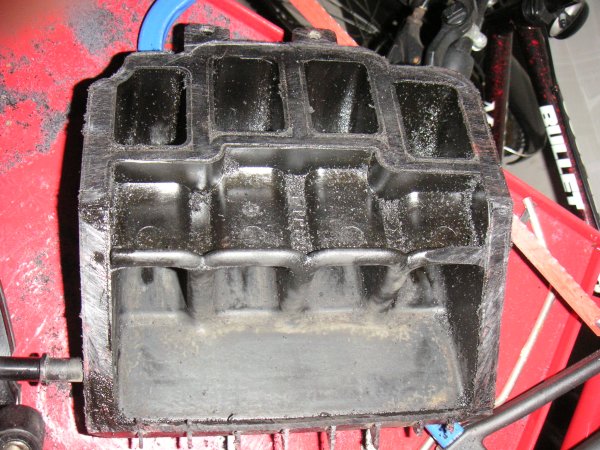
The inside of the manifold isn't great either. There is no plenum to speak
of. The runners that go the the cylinders make a complet 180 degree
turn and they are pretty narrow.
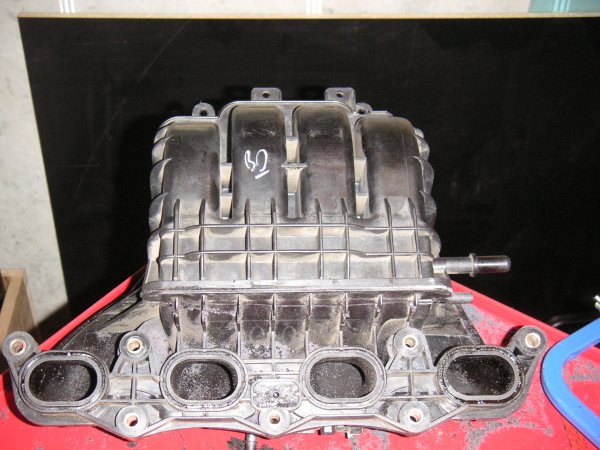
Just after I started modifying the manifold the became clear that the intake manifold from the 2.4 engine that is sold in the US might fit the 2.2 engine. As the 2.4 engine delivers more power at higher RPM it would be probable that it this manifold should be a lot better. Eventually I placed an order in the US for the manifold with Autoparts people. After a couple of weeks I recieved the box with the intake manifold and the throttlebody that is used on the 2.4 engine.
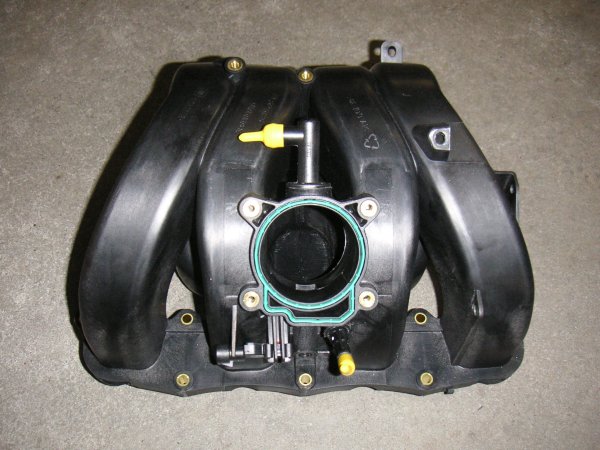
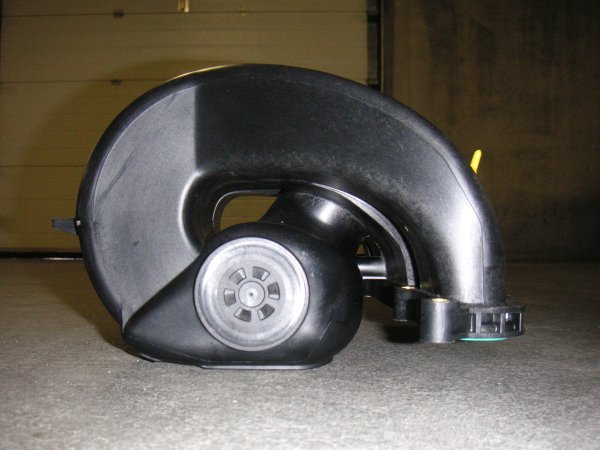
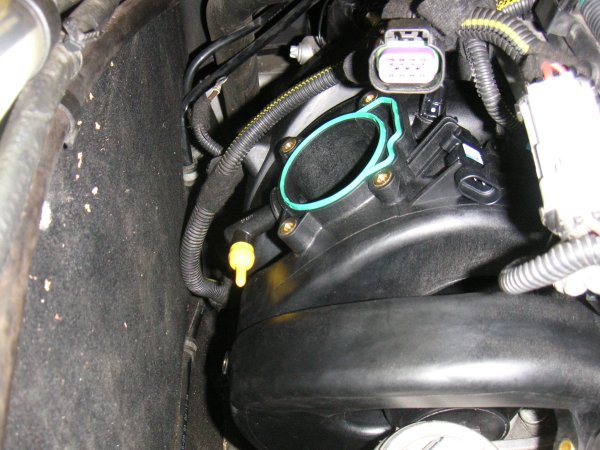
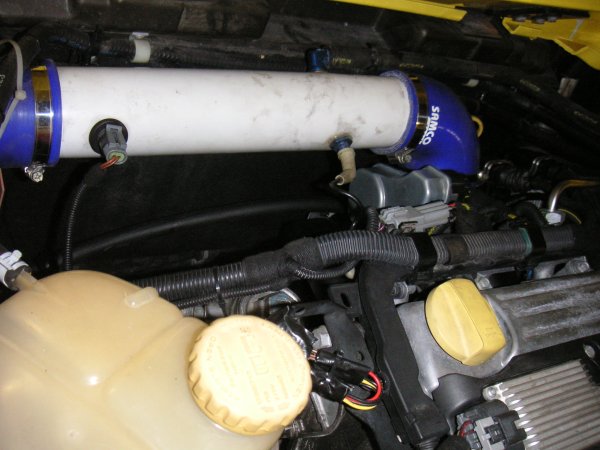
The manifold looks a lot better then the standard one, the runners are a lot bigger and it actually has a plenum.
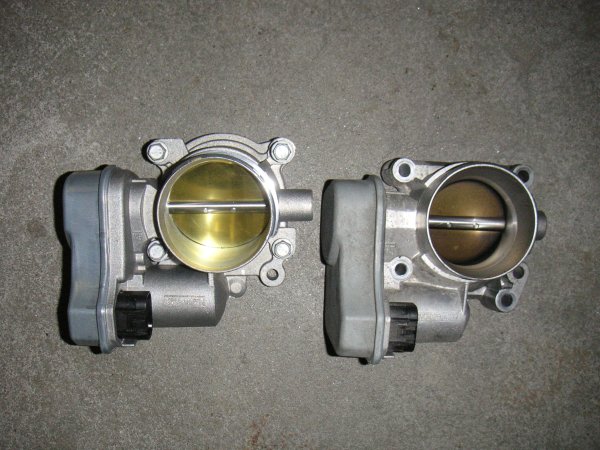
The throttlebody looks the same (it has the same outside diameter) but it does have a 10mm lagers throttle plate (68mm in stead of the standard 58mm).
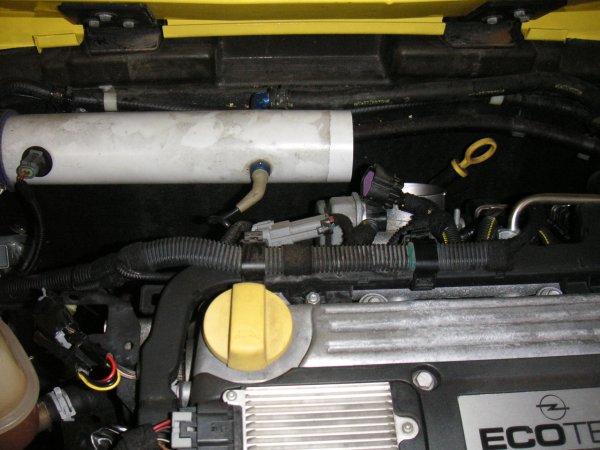
Then it was time to put the new manifold with throttlebody on the engine. Armed with a printout of Vocky's writeup we started by disconnecting the battery. Then the intake pipe including all the hoses and sensors could be removed.
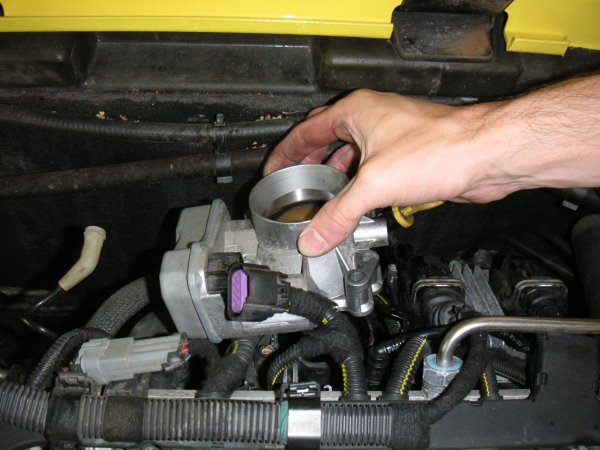
Then the throttlebody can be removed.
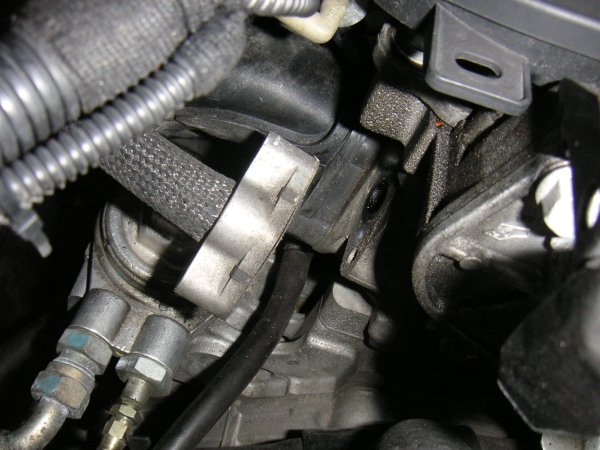
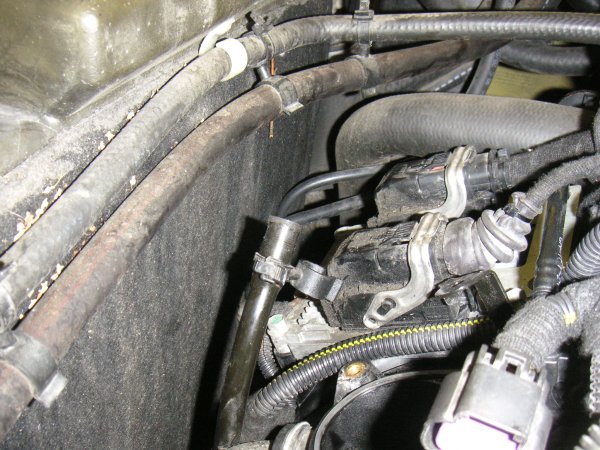
Disconnet the vacuum hose that is near the throttlebody.
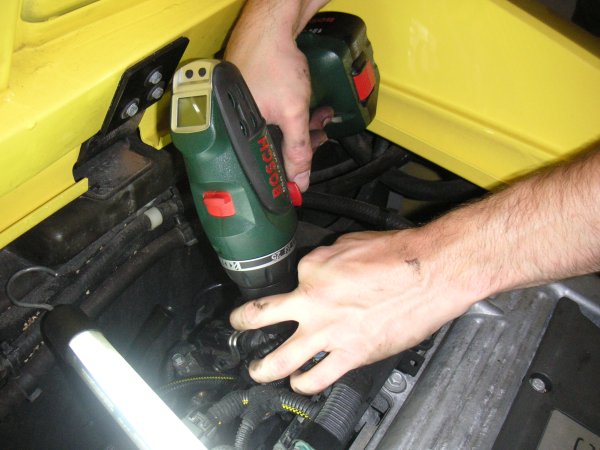
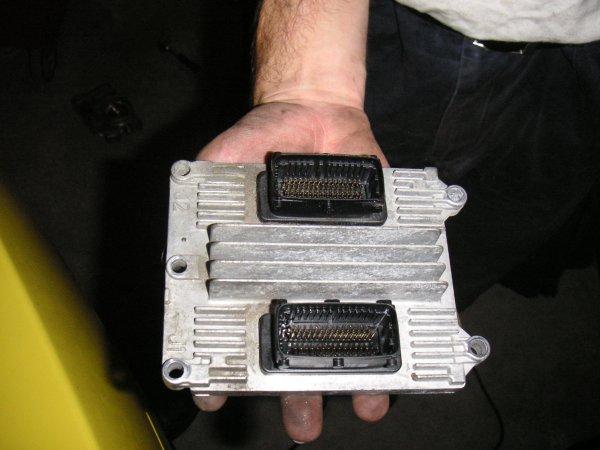
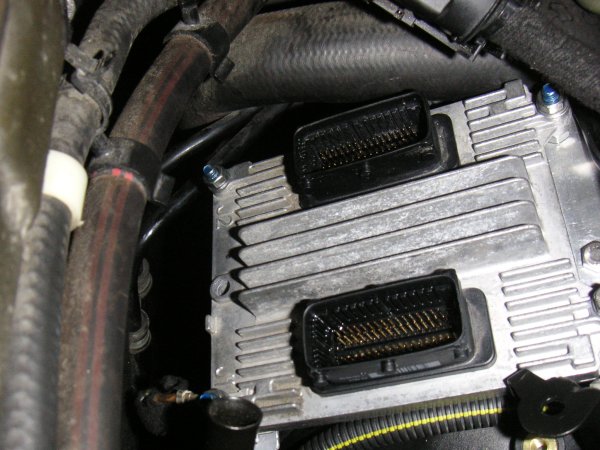
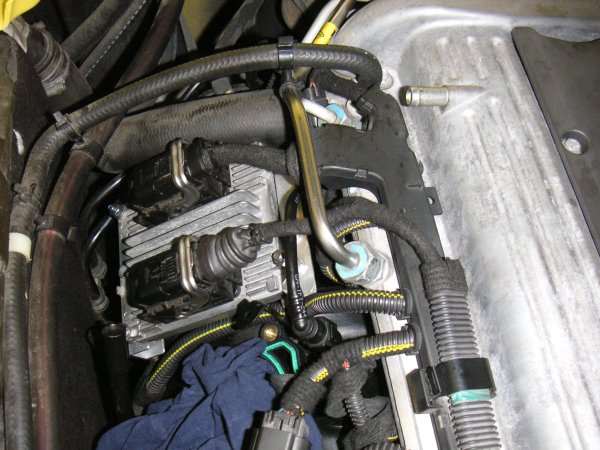
Then it is time to removethe ECU. Unfortunatly you can't just remove the plugs from the ECU. There is an aluminium block behind the plugs that prevents this. It is held in place by two bolts. One has a torx head with a pin in the middle. The other one has no way to be unscrewed, it has to be drilled out.
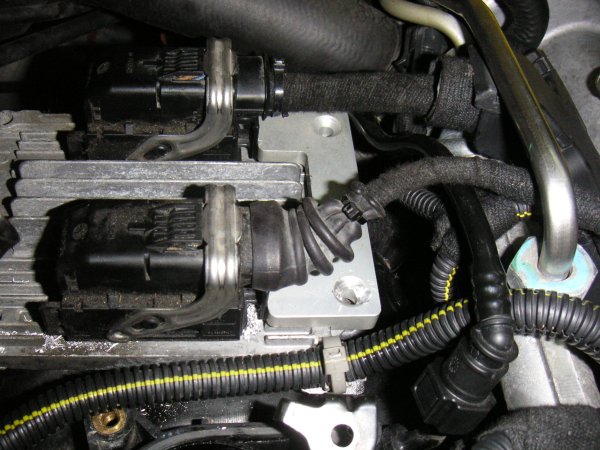
Then the aluminium block can be removed and it is possible to remove the plugs.
After removing 4 bolts the ECU can be removed from the intake manifold.
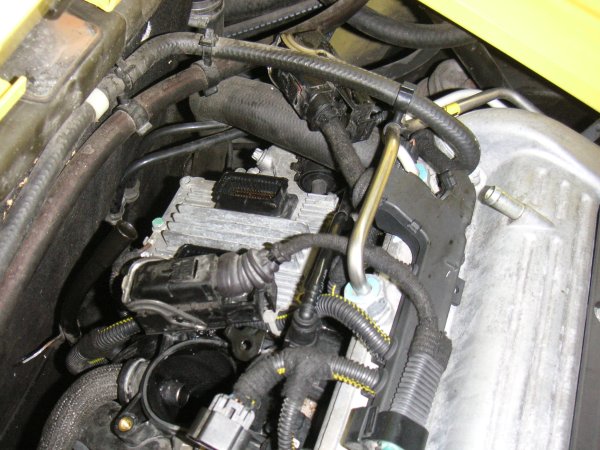
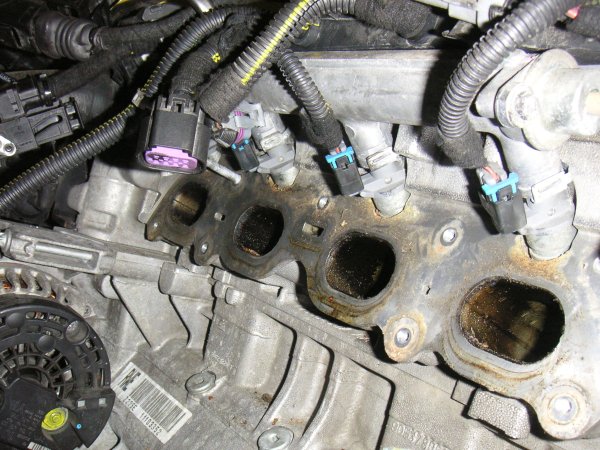
Lastly the manifold itself van be removed. But you do have to disconnect the dipstick guide and the vacuum hose to the brakebooster. The manifold itself is held in place by an number of bolts and two nuts. After removing them you have to remove the studs from the head. You need a torx socket for this. The first one came out easy, but the second one didn't. First the head snapped. Using two nuts to try and get it out didn't help either. So in the end we decided to try and remove the intake manifold with one of the studs still inplace. In the end we succeeded but it wasn't easy. And we had to remove the oil dipstick guide from the engine.
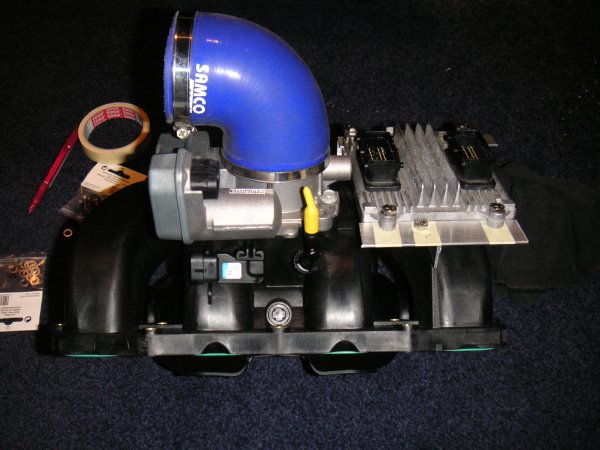
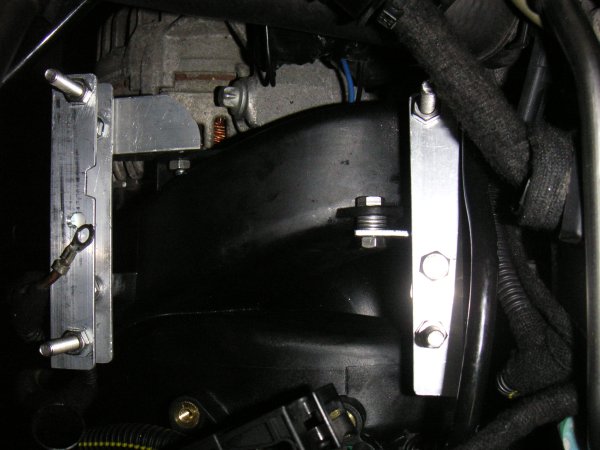
The new manifold does not have any mounting points to which the ECU fits. You have to make something yourself. Using some aluminium profiles we constructed a framework which is had in place with bots on which the ECU can be mounted.
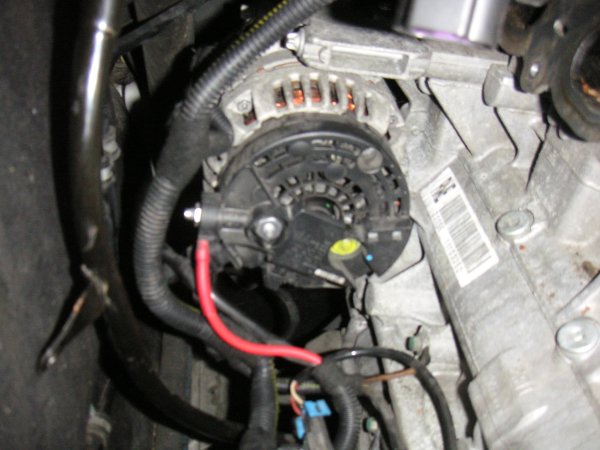
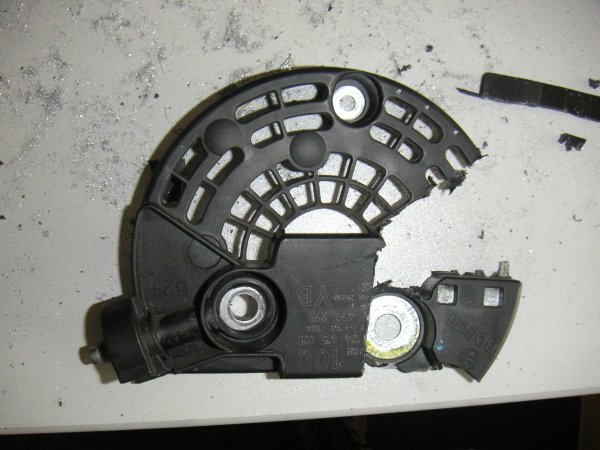
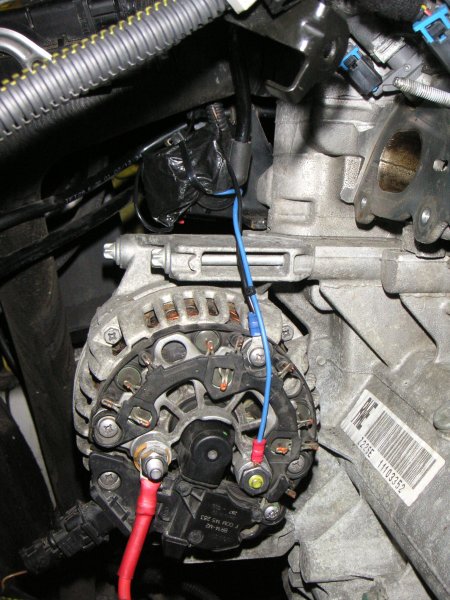
Before the new manifold can be put in place, the alternator has to be modified, because it will not clear the manifold otherwise. Remove the bolts from the alternator and the screw.
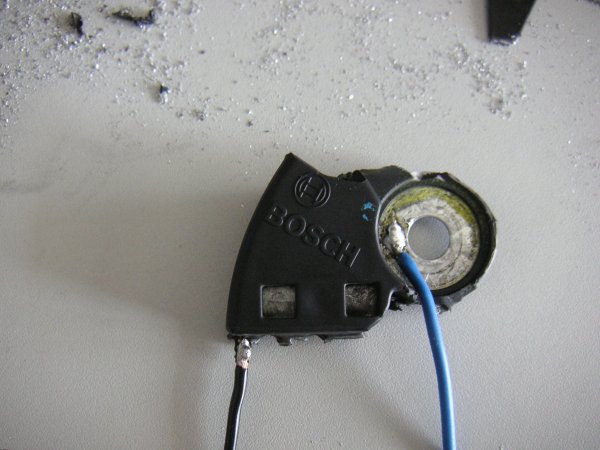
Then the cap can be removed. The manifold will now fit, but the cap contains a noise supression capacitor. After some measuring we got a capacity of 2.2&mirco; fahrad. But we didn't have any further specs on the capacitor. So we decided to play it safe and reuse the one from the cap by cutting it out.
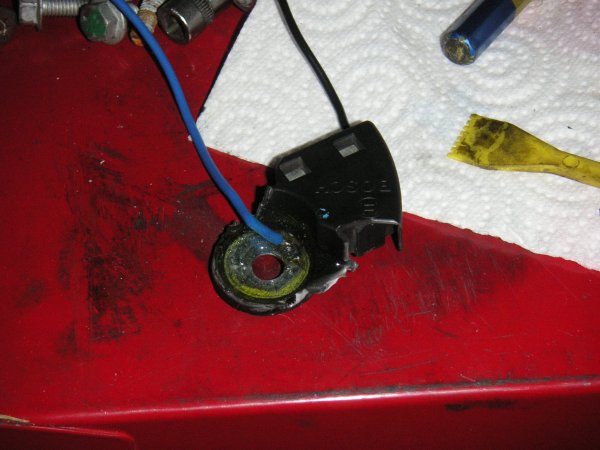
We soldered two wires to it.
We took extra good care to isolate the positive terminal. It was covered in a layer of epoxy.
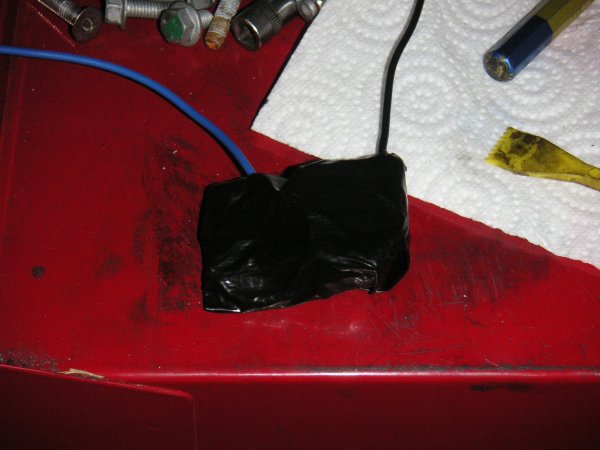
Then it was fully taped.
A couple of crimp connectors were put on the wires and everyting was connected agan.
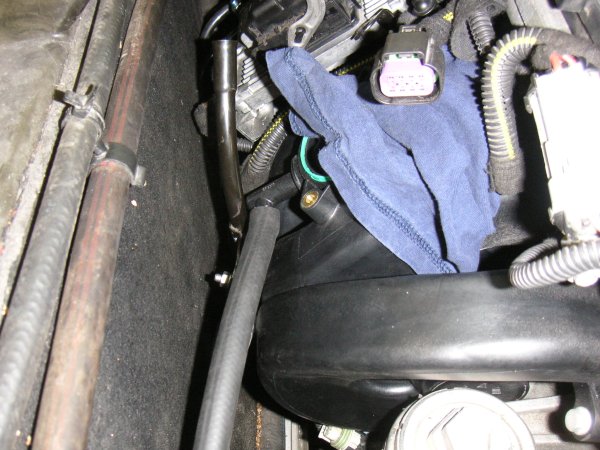
Then the new manifold could be put it in place. Again this is a tight fit. After some pushing and pulling we got it in place.
Then we put all the bolts back to secure the manifold. Before the ECU can be put in place, the framework has to be put in place. It can't be fitted to the manifold beforehand, because then it will not fit in the car. As it is pretty hard to get to it takes some time to get everyting in place. Don't forget to loctite everything. The final result is very nice.
Then the ECU can slide over the 4 bolts and using 4 nuts it can be secured in place. Don't forget to put the groundwire on one of the bolts so that the ECU casing is grounded.
Then both plugs can be put back on the ECU (this time without the aluminium block :) ).
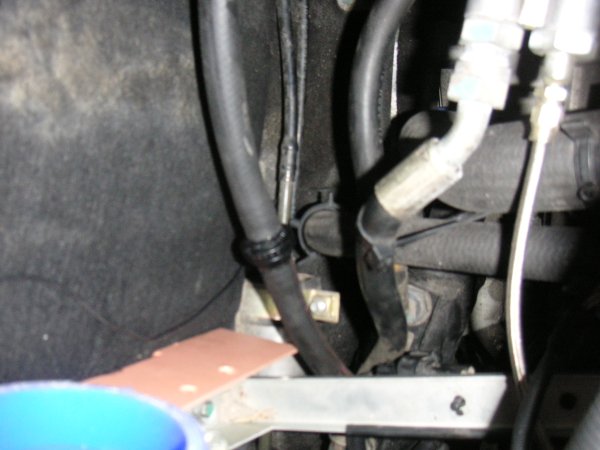
To attach the tube for the oil dipstick to the manifol you need to make a bracket. We made one from aluminium.
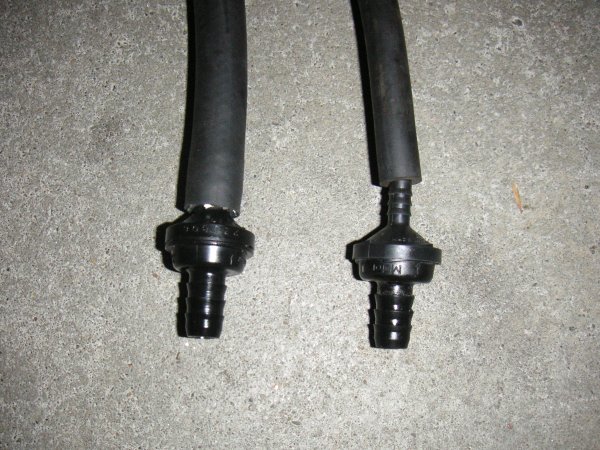
Now the valve that is connected to the hose going to the brakebooster can
be removed. Replace this by the valve that is used in a Corsa. This one is
almost the same, except it has two thick connections in stead of a tick
and a thin one.
Connect the valve with a new piece of hose to the hose going to the brakebooster.
Cut the hose to length so it can be connected to the vacuum connection on the intake manifold.
The throttlebody can be put in place, all the plugs can be put back and the air intake can be put back.
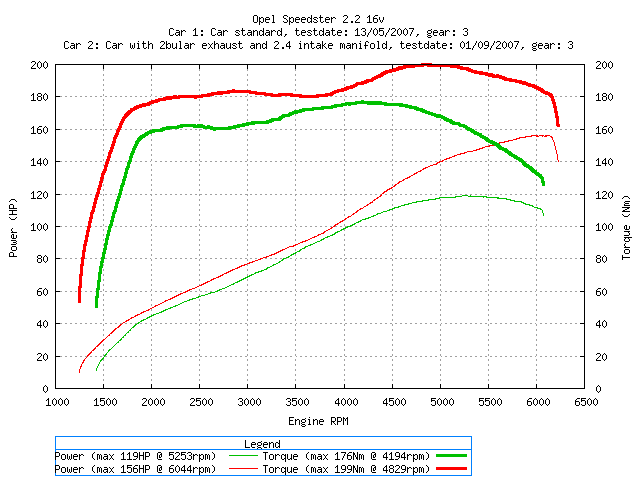
After connecting the battery the engine can be started. It started first time. But it was pretty clear the ECU was searching for the right throttle setting for ide. The airflow is pretty different with the larger diameter throttlebody. After warming up the engine it was time to put a bit more load on it. As a precaution we took a PDA with us with OBD Gauge on it to monitor the ECU. This was proved to be nessecary as the ECU light lit after putting more load on the engine. The ECU started running in limp mode. The was reproducable and every time the ECU logged error P1514. P1514 is described as follows: Code is set when the measured engine airflow does not match the estimated engine airflow as determined by the throttle position. There seems to be some kind of table in the ECU which relates the throttle position to the manifold air pressure the ECU should expect. The code is set when: (Measured manifold air pressure) - (Expected manifold air pressure by throttle position) > 30kPa. So it looks like the 68mm throttlebody has a big influence on the air pressure in the manifold. It flows much better and so the difference is larger then the allowed 30kPa pressure difference and the code gets set. After much searching and checking of all wires we decided to remove the 68mm throttlebody and put back the original 58mm one. That seemed to solve the problem, the engine was running fine again. To get a good seal I used the throttlebody gasget from the 2.2 manifold and not the one from the 2.4 manifold. This one seems to seal better. During driving it was pretty clear the ECU was very busy adjusting the amount of fuel to inject. The long term fuel trim didn't fall under 25% for the first 25km. After about a week of driving it was time to do a power measurement. The results are very good. The graph below shows the difference between the standard engine and the engine with a different exhaust and the new intake manifold.
It is pretty clear that the standard intake manifold is a big restriction
for this engine. |